Wednesday 27 February 2013

Scharding 1809

    Scharding 1809


Austrian cavalry occupy the high ground (top) as IR10 and jagers move into position in the centre. FML Ulm moves forward to attack from the south.


The Austrians come on!  In the background FML Nositz appears on the field, marching to join the chevauleger brigade on the ridge. A French light cavalry brigade arrives to assist the hard pressed infantry.

One battalion of IR10 has sent the French gunners scurrying and in turn has itself been routed after an attempt at storming the building. The Austrian gunners are sheltering in a square of IR11 as it braces itself for a close range pounding from the horse artillery to its front. FML Ulm suffers a mortal wound whilst heroically encouraging his men,  as casualties are mounting on both sides…

Across the river at Scharding the Austrian Uhlans of Klenaus’ division chase off the French skirmishers while infantry and cannon prepare to pour their fire onto the towns defenders.

The pressure builds on the French garrison in Scharding. A part of the town is set ablaze by the Austrian howitzers, the occupants break and are rounded up and sent to the rear as prisoners of war. Still, another French battalion stubbornly clings to the bridgehead…

The murderous close range musketry and cannister fire continues to thin ranks all around the chateau, the French situation seems desperate when suddenly across the stream they can see the eagles of another French division marching on the heights.  

Merde! The farmhouse has fallen!

The French artillery unlimbers to empty a few saddles causing the Austrian cavalry to seek shelter on the reverse slope of the ridge, but still close enough to the advancing French columns to force the right-most into square. Meanwhile a fresh Austrian division has entered the fray, and the French are cut down in swathes in front of its guns!

Still the French come on through the firestorm, inspired by Marshall Lannes, and drive back the first Austrian line. One regiment of Austrian cavalry has been broken by musketry from the French squares.

Meanwhile the Austrians have been successful in clearing the French from the farm, with a jager battalion occupying the house at the far end of the orchard. At Scharding in the background the few surviving defenders fight on tenaciously, driving back an assault by the grenzers and delaying the Austrian attack further as they try to clear space to deploy for an assault on the bridge. The Austrian grenadiers can be seen arriving to the right of the village.

On the heights the initial French assault grinds to a halt as a second Austrian division moves up to reinforce the position.  Then, French hopes are revived as finally the bands of the remainder of the corps are heard coming up the road, the footsore grognards picking up the pace on hearing the sounds of battle grow nearer. At the same time Liechtensteins’ troops have finally managed to drive the defenders from Scharding and the bridge, and the two Austrian formations link up with a cheer!

In the left foreground Austrian reserve units cross the bridge. Fresh French troops move into position to attack.

Looks of concentration (or is that consternation?) on the faces of the French commanders…..

….and in they go!

Quality vs. Quantity. What happened to all those Austrians? The terrible 57eme Ligne and the not-very-nice-at-all 10eme Legere make short work of their conscript opponents.

Whilst on the French left Austrian Grenadiers and Kuirassier return the favour!

Beginning of hour 11. The French hussars in the foreground have rallied and returned to the fray. The French division centre right moves to block the Austrians after a short rest. Leichtensteins’ advance guard (top left) has crossed the river after recovering from a hard morning fighting in the streets of Scharding. Fresh Austrian cavalry appear on the French right. The stage is set.

Austrian dragoons crash into the French right, scattering some battalions and forcing others into square. Austrian infantry pours across the stream to take advantage of the disorganised enemy.

With Austrian cavalry all over them and their artillery routed, the resolve of the French is shattered. What will Davout have to say to Lannes when he learns of the destruction of one of his vaunted X LEGION divisions?

Things that make you go hmmmm……
 

Tuesday 26 February 2013

Desert Campaign Game 3 - Into the Gap (19 November 1940)


Western Desert Campaign  September 1940 -
Game 3 -  Into the Gap  (19 November 1940)
(A Jock Column encounters an Italian Column in the Ebna Gap)


SCENARIO

Into the Gap
The British forces would pass through the Ebna Gap with 4th Indian Division moving northwards to take the camps from behind, 7th Armoured Division screening to the west and south, while 'Selby' Force from the Mersa Matruh garrison would move along the coast road. Logistical problems would be solved by the creation of Forward Supply Depots (FSDs), with Nos. 3 and 4 holding enough fuel, food, water and ammunition for five days of activity, in No-Man's Land.
The setting up of these depots was screened by 'Jock' Columns and a sharp clash occurred on 19 November with an Italian force in the Ebna Gap ended with 5 Italians tanks destroyed and 100 casualties. This stunned the Italians for the next 3 weeks while intensive training by the British culminated in 'Training Exercise No. 1' which had British forces practicing to attack exact replicas of the Italian camps. After this, Wavell gathered his senior staff together on 26 November and briefed them on 'Training Exercise No. 2' – Operation Compass.
On the 19th November 1940 a Jock Column patrolling the Ebna gap encounters an Italian Column of Tanks and Infantry– that is the scenario.


Special Rules
Recon Skirmish Each Player rolls a secret 10 sided dice which is recorded by umpire. The difference between the rolled numbers and 5 for each side are added and the difference compared. A modifier is the added for each recon group.
Each British Recon Group +2
Italian Recon +1 (Ital Berg on Motorbikes) +1
The difference is the number if turns the recon winner has to move, setup and dig in from start point. Any double movement will give opponent a chance of spotting dust.
Italian Recon
Due to poor comms - If Recon > 12” in front of forces then any unit sighted is not immediately visible to all. (This is an attempt to represent the almost complete lack of radios in Italian Vehicles, one of the many advantages that allowed the WDF to dominate the Italians at this time)
Victory Condition. 
(Not Known to players)
British Win if smash Italians 5+ tanks  and 8+ stands Infantry destroyed and not take heavy losses.
Italians win if not smashed and seriously damage Brits.
Otherwise draw.

Map


ForcesBritish Forces
1st Co Infantry 'W' Company, Northumberland Fusiliers Regiment (exp)
1 Commander
9 Infantry (3 with Boyes)
Bren Lmg
2” mortar
Trucks * 4

Choice of 9 points worth of Units
Group
Cost
1st Recon Group  - 2 * Dingos (Exp)
1
2 nd Recon Group –  2 * Rolls Royce Armoured Cars  (Vet)+ 2 * Scout Carriers with Recon 1*Lmg, 1*Boyes (Exp) 1st Recon is required to purchase this group.
1
Armour Group A - A9 * 2 (1 Commander)  & Vickers Light Tank (Vet)
2
Armour Group B - A13 * 3 (played in this scenario by crusaders) (exp)Arm Group A is required to purchase this group. this needs changing  too many tanks for a jock column
(this should cost more maybe 4)
AA section Bofor  + Truck
1
AT Gun 37mm AT + Truck
1
AT Guns 2 * 2lb AT + 2 *Carriers
2
25 lber 1 Gun + truck
1
25 lbers 2 Guns + truck & FOO
2
Italian forces
Recon     AB41 (Exp)
Armour      Light Tank Company  (Exp)
            L/35 Light Tank * 4
            L/33 Lanciafiamme
      Med Tank Co  (Exp)
            M11/39 Medium Tank * 2
            M13/40 Medium Tank * 2

Infantry     Bersaglieri Company  (Exp)
            Commander
            20mm Solorthurn ATR
            8 * Bersaglieri
            8mm Breda 37 MMG
            45mm Brixia Mortar
            Trucks

      Motorised Inf     Company (Trained)
            Commander
            9 * Rifle Section
            3 * Rifle & LMG
            45mm Brixia Mortar
            Trucks

Choice
Bersaglieri Motorcycle scout Platoon (Exp)
            1 Commander
            3 LMG
            4 Motorcycles

 
Battalion Artillery Section
1 65mm Infantry Gun (Exp)
 1 Light Truck

How it played outUnsurprisingly the British win the Recon (especially since Italians went for Artillery option) and setup as shown below to ambush the Italians.

The Italians advance confidently across the board and encounter the British recon which has been left too far forward to be supported by other British troops.  After a Scout Carrier takes out the AB41 with it Boyes AT rifle the Carrier is destroyed followed by a Roller on the Italian left as they advance cautiously through the brush.
The Italians continue to show elan and attack the British positions around the rocky outcrop but an L33 is destroyed while close assaulting the Bofors and then the 25 lbers give the Ities a nasty shock and destroy 2 tanks with direct fire... ouch! Meanwhile on the left the Italian infantry has de-trucked and inches forward.
The Italians are slightly spooked by the Dingo and some trucks on their right flank and face some tanks off against them, but it is the usual British chicanery and the trucks are empty.  A bit of whinging goes on about trucks but I don't have an issue with empty trucks being used as diversions but won't allow them to be used as to attack with.
The British tanks then make an appearance (of which they have too many for a historically accurate Jock Column) and have short ineffective dual with M13/40s (the A9s really are bad tanks) before the Italians wisely decide to withdraw in good order after the A13s show up and with the 25lbers lobbing shells at them.  The British show a lack of dash and let the Italians withdraw when I feel confident that O'Connor's men would have pressed them and made the Italians pay a higher price than was extracted in this game.
Result - A very marginal Italian victory, mostly because of the dash shown by their armoured units and because they successfully executed that rarest of manoeuvres in our wargames a successful retreat.

Photos


The Italians advance past the burning wreck of the Scout Carrier.  In the background can be seen the salt marsh.


On the Italian left the front Roller is in strife and brews up soon after, on the right the Italian infantry can be seen cautiously advancing in the brush.


A bold attempt but this is the beginning of the end for the Italians.


A closeup of the devastation reaped by the Bofors and the 25 lbers.


On the British right the A13s show up and send the Italians packing.


The Italians execute a fighting withdrawal to score the marginal victory.

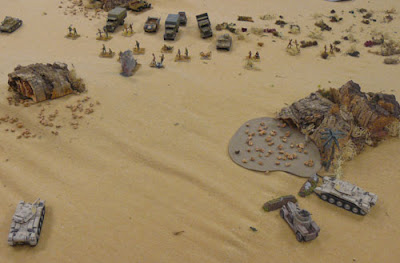
Desert Campaign Game 2 - Jock Column vs Supply Convoy (Mid November 1940)


Game 2  - Jock Column vs Supply Convoy (Mid November 1940)
 (British harass the Italian near Sidi Barrini)
SCENARIOBritish Scenario
The After the Battle of Sollum on 15 September 1940 the Italians pressed into Egypt, advancing 60 miles in three days. Halting at Sidi Barrani, the Italians dug in to await supplies and reinforcements. These are slow arriving as the Royal Navy had increased its presence in the Mediterranean and was intercepting Italian supply ships. The British are planning to exploit the Italian’s lack of mobility and are preparations for an attack are underway.
In the meantime the British harass the Italians with a new tactic of using mixed formations called Jock columns, named after an officer who was a superb exponent of the tactic and may have conceived it originally, Lieutenant Colonel "Jock" Campbell. A Jock column normally consisted of a single motorised company of infantry, a battery of field guns, support weapons and some armour or armoured cars.
You are in command of such a Jock column that has been sent to disrupt Italian communications and supply. The attack must be short and sharp as dallying may call the Italian airforce on your head and you have no air support.
British Victory Conditions
Shared Objective 1 – destroy the supply convoy (66% +)
Common Objective 2 – Maintain your forces for future operation < 33% losses.
Failure is an option – loose both of the brand new 25 pdrs and you lose irrespective of whatever else happens.

Italian Scenario
After the victories in September the glorious 10th Italian Army has advanced 60 miles to Sidi Barrani and dug in to wait for reinforcements and supplies, which are taking longer than hoped due to the Royal Navy attacking our convoys.
 The Italian army has built 6 fortified camps in front of Sidi Barrani and are in a strong position to hold off the British forces.  The desperate British are sending their Armoured Cars out into the desert and attacking our supply lines, they have some limited success in shooting up a few supply trucks delivering the essential supplies to these camps.  You are in command of the forces that will make sure they won’t interfere with the convoy you are defending, the supplies must get through.
 The Convoy is commanded by a Supply Major who is nervous about attacks as his previous convoy was largely destroyed after the escorting AB41s went to investigate a dust cloud. He is using his rank to force you to keep all your forces within 6” of the convoy.  If the Tommies in their ancient armoured cars are unwise enough to attack your convoy you will be able to act independently and also take control of the convoy to achieve your objectives.
Italian Victory Conditions and Rules
Shared orders get 50% of supply trucks through to the other end of the board.
Command 1 orders – Your commander is furious that British Armoured Cars are making him look bad. If you can destroy 50% of the British Armoured Cars you will almost certainly get the vacant Captaincy in the Regiment.
Command 2 orders – One of the trucks which you can choose before the game contains Colonel Camprizzi’s personal supplies. He has told you in no uncertain terms that if this truck doesn’t get through you will be leading a penal squad of colonial troops on latrine digging duty on a permanent basis.
Additional Information
If you are attacked you can put out a call for air support and after a random number of turns (10+) the Regia Aeronautica will come to your aid. But you are desperately short of radios and you only have 3 which can call in the air support once it arrives, Infantry Commander, L33 commander and the convoy commander in his car. If all 3 of these are destroyed you can not call in air support. If your commander is killed and replaced the replacement does not come with a radio.

Map


ForcesItalian Order of Battle
The Convoy
10 Trucks
1 Fiat 500 Car

Command 1
Light Tank Company (Exp) 6 * L33 (4 *MG + 2 *20mm) (Inc Commander)
1 * L33 FlameTank
1 AB40 Autoblinda Armoured Car

Command 2
Bersaglieri Motorised Co. (Exp)
1 Commander
1 20mm AT
8 Bersaglieri
8mm Breda 37 MMG
45mm Brixia Mortar
1 Model 13 Infantry Gun
Trucks
1 Car

Motorcycle Scout Platoon (Exp)
1 Commander
1 Motorcycle
3 LMG
3 Motorcycle

British Order of Battle
A Coy, 1st Btn, South Staffordshire Regiment (Exp)
Commander
10 Infantry, 3 with Boyes AT Rifle ,
2 Bren Gunners,
2” mortar,

Transport
3 Universal Carriers (take 2 Troops)
2 Bedford 3 Ton Trucks.

Support 2lb AT Gun towed by Universal Carrier (Exp)
Elements from 4th RHA & Support
2 * 25lb guns towed by Morris Tractors (Exp)
1 * FOO
1 40 mm Bofors AA towed by Morris 15 CWT truck

Armoured Reconnaissance Squadron from 11th Hussars
2 Rolls Royce Armoured Car (Elite)
2 Morris CS9 Armoured Car (Vet)
1 Vickers Light Tank (Exp)
Dingo Armoured Car (Vet)


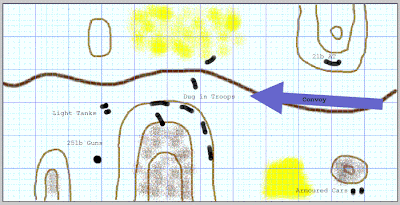
How it played outThe 25 lbers and 2 lb At gun open up on the convoy once it reached the middle of the board and some of the trucks are immediately disordered.  The Italians defenders respond and the 2lb AT gun is suppressed, it does seem very exposed with only it's Universal Carrier for support.  The Bofor AA gun opens fire and takes out a motorcycle and continues to be one of the most effective British weapons throughout the game.
In the next turn the 25lbers have some success and 2 trucks are destroyed, meanwhile some L33 tankettes and some of the Bersaglieri overrun the British positions near the road.
In Turn 3 the Rolls Royce Armoured cars attack the convoy from the flank and some L33s respond.  The Italians close assault and destroy the 2lb AT gun.
Over the next couple of turns there is confused combat as the British Armoured Cars and Bren carriers assault the convoy resulting in losses on both sides.  The Autoblinda Armoured car makes a solo sortie against the British infantry dug in on the hill and is destroyed while taking out the British Mortar.
The Italians try a mass attack against the remaining Rolls Royce but the wily desert veterans of the 11th Hussars turn the tables and see off the Italian horde.
At this stage the Italians recognise that they are not going to get the convoy through and having suffered nearly 50% losses to the convoy and heavy losses to the light tank company they withdraw in good order.
The British belatedly realise that time is up and start to load up into their transport to retire into the desert just as the Regia Aeronautica arrives in the form of a  Fiat CR-42 which in the final act of the game shoots up the last Rolls Royce armoured car.
The game is a marginal victory to the Italians as even though the Italians failed to get the convoy through, the British have suffered heavy losses and did not inflict enough losses on the convoy.

Photos

The Italian Convoy approaches the ambush site.


The Italians quickly overwhelm the British positions near the road.


British Armoured Cars move to attack and Italian L33 tankettes defend the convoy as the 25lbers continue to shell the trucks..


A Rolls Royce Armoured car harries the convoy


The view back towards the convoy showing the British positions around the ridge and the light tank and armoured cars holding the road.


The Italians try to overwhelm the valiant 11th Hussars in their ancient Rolls but are beaten off.


The Convoy withdraws past the burning wrecks of the fallen
.

Monday 25 February 2013

Desert Campaign Game 1 - The Battle of Sollum 13th September 1940

SCENARIO
The Italian 10th Army under the command of Maresciallo d’Armata Graziani has reluctantly invaded Egypt on the orders of Mussolini. The 10th is unprepared for war but under heavy political pressure and considering its far superior manpower has crossed the border as ordered, hopeful for success, but with commanders who are full of dread that disaster awaits them. Heavily outnumbered the British decided to withdraw in front of the invaders, fighting holding actions at various points to delay their advance.
Not long after starting the operation the Italian 10th Army is making its way down the Halfaya pass headed for Sollum. Most of the army is without transport resulting in slow progress by the infantry. In this scenario the British need to move some of their dumps from the general area of Solum, however the largest dump is too big to move and will have to be blown up to prevent capture. Historically the Italian force created its own chaotic road conditions by trying to send too many troops down the narrow pass road at once.

ITALIAN VICTORY CONDITIONS & RULES.
  1. Inflict >33% losses on enemy
  2. Capture intact dump
  3. First Italian units to occupy Sollum and raise our glorious flag will attract the eye of the General.
To represent the restricted entry of the Italian forces coming down through the Halfaya Pass, a single road is used at their entry end. All Italian units must enter via that road in single file. Any confusion and movement difficulties caused by this will represent the traffic jams that occurred in the pass during the real battle.
This is determined by the following rule – Italian players select a Unit to enter board. 1-3 Nothing happens, 4 – 7 move on single move & finish, 8-10 move on single move and pick another unit.
Battalion IV of the 32nd Tank Regiment and the Bersaglieri Motorcycle battalion negotiated an old trade pass to attack on the flank as shown on the map
BRITISH VICTORY CONDITIONS & RULES.
  1. The British force will hold while the dumps are either blown as per die roll above, or their contents removed by trucks. British commander must elect to either withdraw the dumps, or to blow them.
  2. The British combat units are required elsewhere so they must retire with no more than 33% material loss.
  3. Whoever bags the most Itie tanks will have bragging rights at the mess but only if things go well.
To determine how long it takes for each dump to be prepared for demolition and then blown, roll a d10 and add the score to 5 (note - this number may need to be higher). The resultant number equals the moves before it can be blown up. NOTE truckloads can be removed at the rate of one per move. However none can be removed during the last two moves before a dump is blown. If they are all removed there is no need to blow the dump. Each truck that leaves the tabletop via the line of retreat is considered to have successfully escaped. The truck model is put back on the table at a dump of choosing to represent another vehicle that has become available.
In real life the British bombarded the Italian units as they negotiated the pass. The British will predesignate some aimed points which will allow better chance of calling in artillery.
This scenario borrows heavily from a scenario by Mal. Wright for Blitzkrieg Commander THE FIRST BATTLE FOR SOLUM.

Map


Forces
Italian Order of Battle
32nd Tank Regiment. (Exp)
  • Battalion I. 3 * M13/40
  • Battalion II..2 * M13/40
  • Battalion III 4 * M11/39 (Fiat)
  • Battalion IV..6 * L33 (4 *MG + 2 *20mm) + 1 * Flame L33
Bersaglieri Motorcycle Co.6 figs – no support (Vet)
2 * Bersaglieri Motorized Company. 9 figs + mmg + Breda (Exp) with transport
Reconnaissance.
1AB40 (Exp)
INFANTRY. 3 Companies of Libyan infantry without transport. No mortars or machineguns.(Trained)
ARTILLERY. 1 Batteries 75mm field guns. (2 models).
AIR SUPPORT. 3 air attacks CR42 aircraft. (Strafing only)
British Order of Battle
11th Hussars.
  • 1 Vickers Lt Tank (Vet)
  • 2 Rolls Royce A/C (Elite)
  • 1 Dingo A/C (Vet)
1 Company reconnaissance infantry. (6 figs) in three Scout Carriers (Vet) 1 Universal Carrier towing 2lber AT
4th RHA. 1 Battery of 3 x 25pdr field guns. (Exp) . Attached. 1 Battery AA
COLDSTREAM GUARDS. 2 company of 9 infantry figures (Vet). support Co. of 1 MG, 1 mortar, 1 2pdr anti tank gun and a HQ base(Exp). Fully motorized. The trucks must be retained nearby to allow the unit to retire.
AIR SUPPORT. 1 Air attack (bombs) with Blenheim aircraft. 1 Air attack, (strafing) with Gladiator aircraft.
Army Transport, Supply and Depot companies. 12 x 3 ton trucks. 1st PARK coy. General supplies. 15 truck loads. 2nd PARK coy. Fuel supplies. 18 truck loads. 3rd Park Coy. Ammunition. 12 truck loads.

How it played out
The Italians advance slowly through the Halfaya pass leading with their Infantry on foot which were hammered by the mighty Gladiator's strafing run and some heavy pre-designated artillery.  They continue to advance and strike the first Allied minefield in the mouth of the pass. 
Turn 4 sees the first of the Italian tanks appear which advance around the minefield and by turn 8 the Italian engineers have cleared the minefield.  
Turn 9 sees the first shots fired and on the right flank the British Recon with their 2lber on the rise and carriers take a toll on the the Italian attackers wiping out several light tanks.  
Turn 10 starts with a bang when the recently arrived Italian Auto Blinda AB40 recon finds the second allied minefield by running over a mine and blowing up and the recon 2lber continue to make the Italians pay on the British right flank...but have they stayed too long?
On the Italian right flank things are going well, the L33s and Motorcyle Bersaglieri have out flanked the British positions covering the road and the British have had some serious morale issues which are hindering their attempts to retreat
Turn 12 sees the first of the dumps blown up and sees some typically cunning British subterfuge where they attempt to convince the Italians the explosion is a misdirected heavy bombardment from a battleship, the Italians seem to fall for it and fail to see through it when given a roll (the jury is still out on this but the result is the book), and this continues for the next dump blowing up with another simple roll failure.
The British have held off the Italians for long enough but don't manage to retreat their front line troops.  The British Recon on their right flank is wiped out to a man after making the Italians pay and the Coldstream guards retreat in their trucks from the old fort (the only decent cover on the board) with Italian light tanks bearing down on them and are slaughtered as well.
About this stage the Daimler Dingo enters wargaming mythology by being routed but recovering and proceeding to cut the Italian infantry down in swathes from the rear, it can't be stopped!
By turn 16 the British have blown the last dump and retreated with cover from a few Cruiser tanks that turn up and the Italians have inflicted heavy losses on the British but did not manage to capture a dump and the game is declared a draw. 

Photos

Italian tanks advance down the main road past the outflanked British left flank positions.
Note the Dingo in the rear about to wreak havoc on the Italian infantry.


Bersaglieri Motorized infantry attack under heavy fire

L33 tankettes advance through the Old Fort at Bir Saleh after outflanking and dispatching the fleeing Guardsmen on the British left.

A pair of Rolls Royce Armoured cars prepare to fend off the Italians to cover the general retreat.

Sunday 24 February 2013